


6 Ways To Weave In Your Ends
Knitting | 4 min read time
No matter how much we may dislike it, weaving in your yarn tails is always an inevitable step at the end of a project.
Why do we weave in ends?
-
To make sure they are secure and prevent your project from unravelling.
-
To hide the ends so that they are invisible on the right or front side and don’t poke through.
-
To make your project neater, give it a finished look, and more comfortable to wear.
There are many different ways to weave in your ends, and every knitter has their favourite. Ideally, if there is a seam in your project, you should weave your ends into the seam. That way it will be hidden, and if it pokes out, it will likely do so on the wrong side where no one can see it.
Of course this is not always possible, so below we’ve put together six ways to weave your ends into Stocking Stitch, Garter Stitch and Rib Stitch. These techniques can be used with any of our yarns - we'll be using The Chunky Wool to demonstrate!
Top Tip: Wherever you leave a tail of yarn in your project, make sure it's approximately 15cm long. This will make it easier to weave in using a sewing needle. You can always trim the excess after weaving in.
Stocking Stitch
The following techniques would be suitable for weaving in the loose ends of our Vale Scarf or Masley Cushion Cover Knitting Kits.
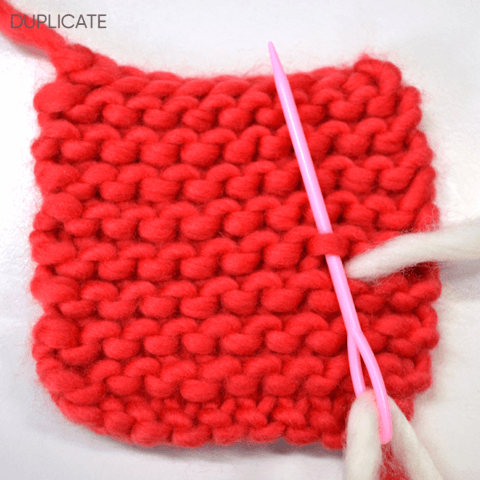
Duplicate Stitch
Duplicate Stitch is an embroidery technique that follows the direction of your knitted stitch. Weaving in your ends using Duplicate Stitch means you will sew along the path of your yarn. There are three versions of Duplicate Stitch in this blog post, which vary depending on the type of stitch you have worked, and the side of the work you are weaving on.
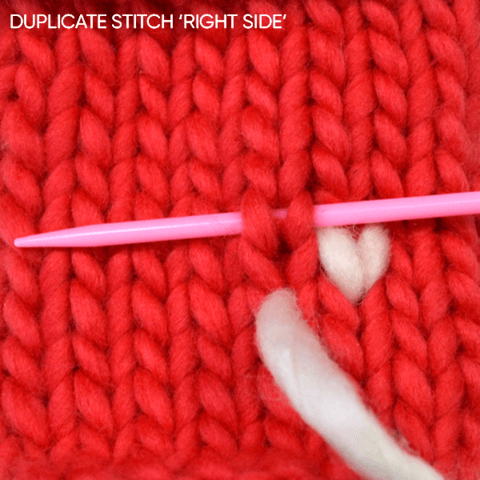
How to Sew Duplicate Stitch: Right Side
Step 1
From the back of the work, take your threaded sewing needle and bring it through to the front at the bottom point of the starting 'V' stitch.
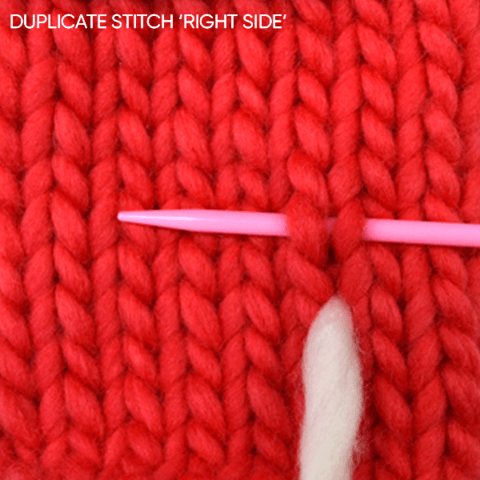
Step 2
Take your sewing needle through the second stitch up inserting the needle from right-to-left under the entire ‘V’ and pull your yarn through.
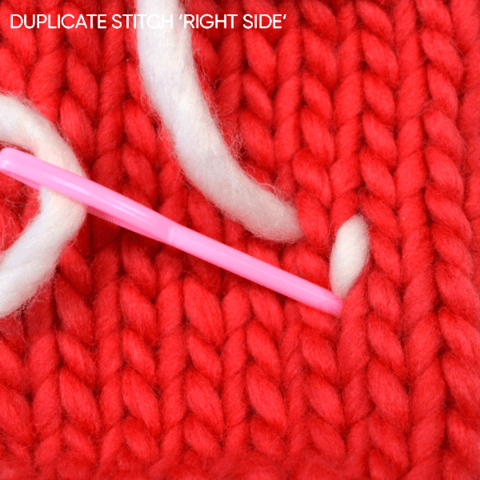
Step 3
Complete the stitch by inserting the needle in the same place where you started off and pull your yarn through. You have now duplicated one stitch.

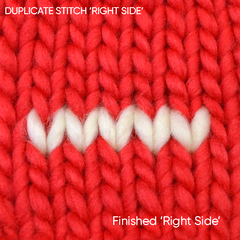
Step 4
To create the next stitch, bring your needle to the front again at the bottom point of the adjacent 'V' stitch and repeat steps 2 and 3.
Step 5
Repeat steps 1-3 for a few more stitches or until you feel your end is secure.
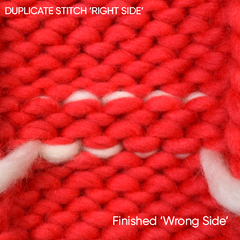
How to Sew Duplicate Stitch: Wrong Side
Step 1
From the front-side of the work, take your threaded sewing needle and bring it to the back. Insert your needle up under the nearest purl bump.

Step 2
Following the path of the yarn in the stitched fabric, rotate your needle and bring it towards you. Insert your needle under the purl bump adjacent to the original purl you went under and continue under the purl bump in the row below, slightly to the right.

Step 3
Rotating your needle again, and angling it slightly to the right, insert your needle under the purl bump adjacent to the previous one you went under and continue under the purl bump from the row above that you previously came down through.

Step 4
Repeat steps 2-3 for a few more stitches, following the path of the knitted yarn, until you feel your end is secure.

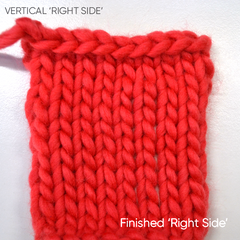
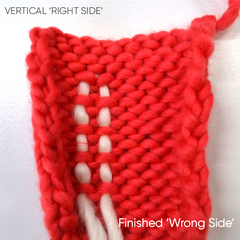
Your front and back should look like this:


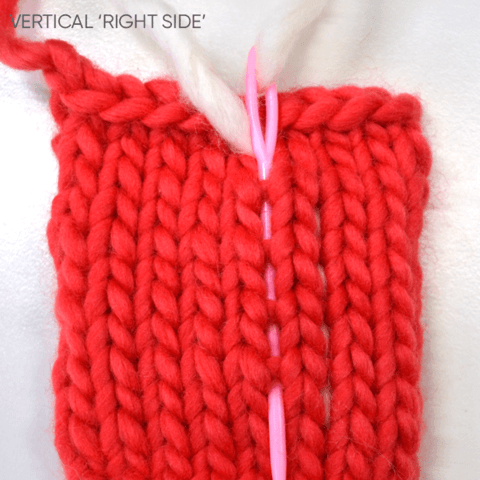
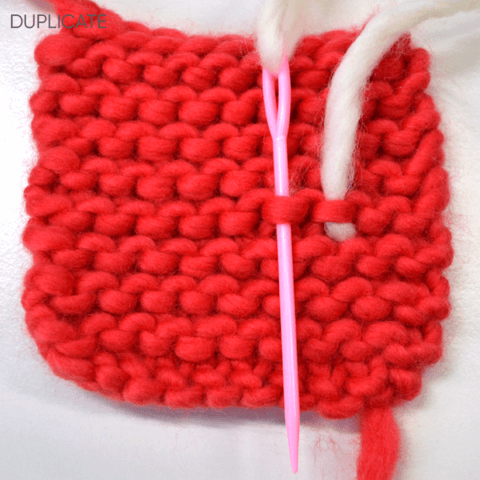
How to sew in vertically
Step 1
From the back of the work, take your threaded sewing needle and bring it to the front between a 'V' stitch.
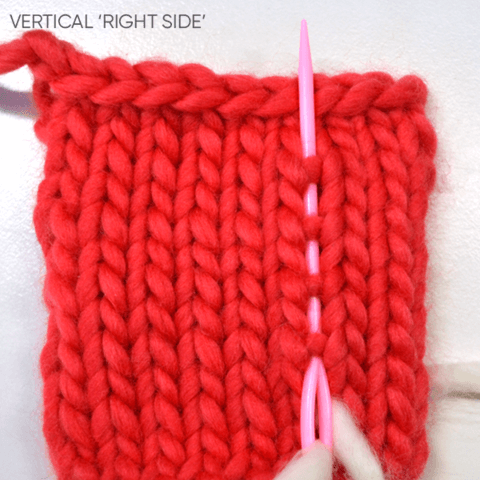
Step 2
Working vertically, weave your needle under every other horizontal loop of yarn that stretches between the ‘V’s created by the knit stitches. (Stretching your fabric horizontally will make these loops more visible.)

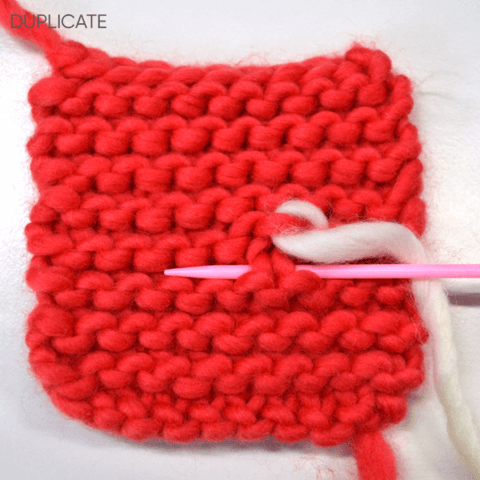
Step 3
Holding the needle perpendicular to the stitches you just made insert it from right-to-left under the adjacent ‘V’ and pull your yarn through.
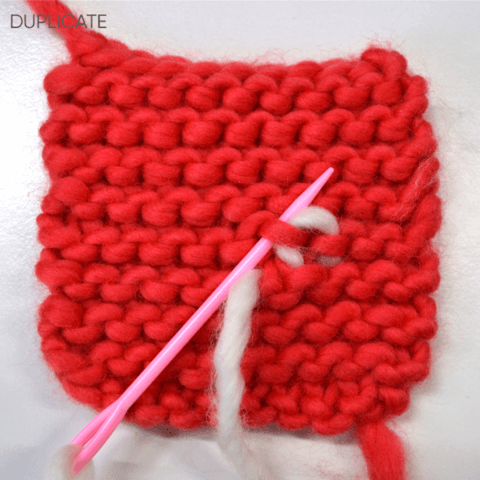
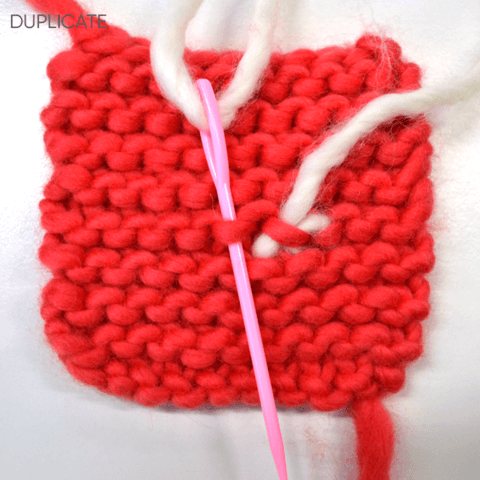
Step 4
Again working vertically, this time with the needle pointing towards you, weave your needle under every other horizontal loop of yarn that stretches between the ‘V’s created by the knit stitches.
Garter Stitch
The following techniques would be suitable for weaving in the loose ends of our Grazier Scarf Knitting Kits.
Duplicate Stitch
Duplicate stitch for Garter Stitch is a combination of duplicate stitch for Stocking Stitch 'right side' and Stocking Stitch 'wrong side'. You will follow the path of the knitted yarn, hooking a purl stitch at the top of the row and then a ‘V’ of the row below.
Step 1
Insert your threaded needle up under the nearest purl bump.
Step 2
Rotating your needle towards you insert it under the adjacent purl bump and pull your yarn through.
Step 3
Bringing your needle parallel to the rows of ridges, created by Garter Stitch, insert the needle under the ‘V’ in the row below and pull your yarn through.
Step 4
Rotating your needle again, and angling it slightly to the right, insert your needle under the purl bump that you previously came down through.
Step 5
Again, rotating your needle towards you insert it under the adjacent purl bump and pull your yarn through.
Step 6
Repeat steps 3-5 until you have duplicated about five stitches.


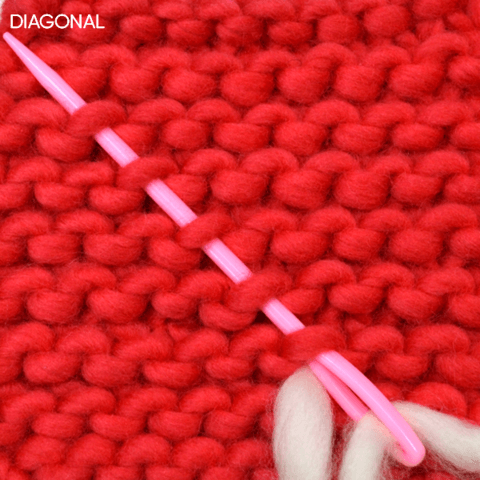
How to sew in your ends diagonally
Step 1
Point your threaded needle at roughly a 45 degree angle. Weave it diagonally under the purl bumps of each of the above four to six rows and pull your yarn through.
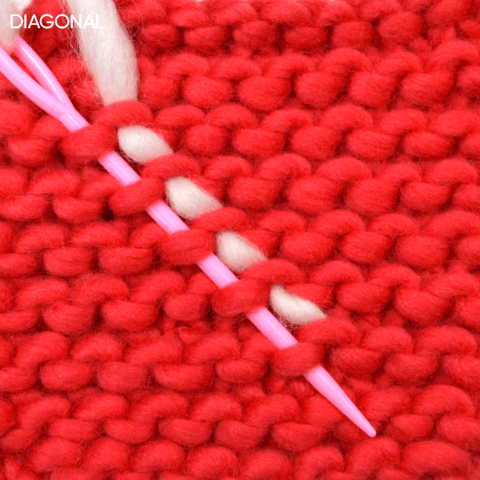
Step 2
Rotate your needle 180 degrees. Weave it diagonally under another four to six purl bumps, parallel to your original stitches, and pull your yarn through.
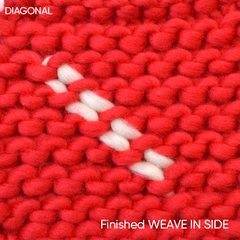
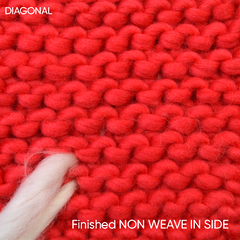
Your front and back should look like this:
Rib Stitch
The following techniques would be suitable for weaving in the loose ends of brims or cuffs, like in our Personalised Baby Hat Knitting Kit.
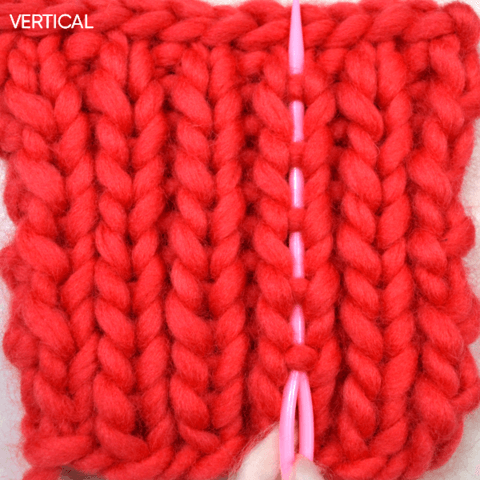
How to sew in your ends vertically
Sewing your ends vertically for Rib Stitch is similar to weaving in ends vertically on Stocking Stitch.
Step 1
Working vertically on the 'wrong side', weave your needle under every other horizontal loop of yarn (about five) that stretches between the ‘V’s created by the knit stitches. (Stretching your fabric horizontally will make these loops more visible.)
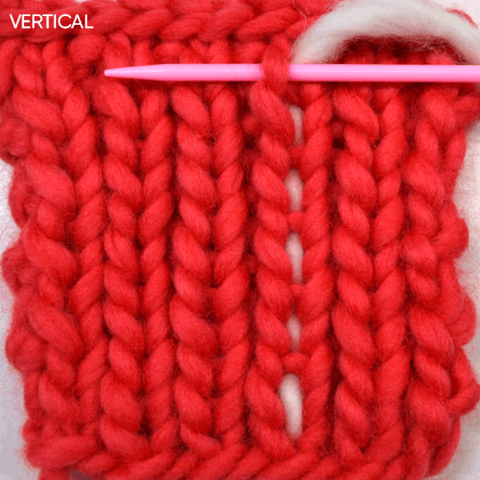
Step 2
Holding the needle perpendicular to the stitches you just made insert it from right-to-left under the adjacent stitch and pull your yarn through.
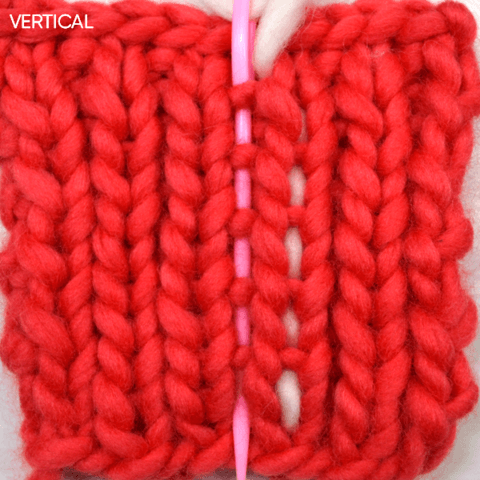
Step 3
Again working vertically, this time with the needle pointing towards you, weave your needle under every other horizontal loop of yarn (about five) that run parallel to your original stitches.
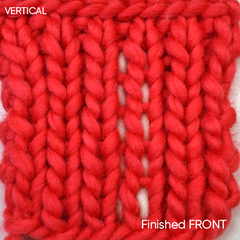
Your front and back should look like this:

We've knitted these samples on 8mm Bamboo Knitting Needles using The Chunky Wool in True Red and Ivory White.
The images above are for demonstration purposes only. In an actual project lengths of yarn would not be left showing on the right or display side of your knitting. Always trim excess yarn.

Handmadebyhafsa - A Story Maker
2 min read time
Craftyparenttools - A Story Maker
2 min read time
Top 5 Granny Square Tips & Tricks
1 min read time
How do I start?
1 min read time
Setting your 2024 Crafting Intentions
3 min read time